Chaining multiple AWS Lambda functions to host a Slack app
September 20, 2017
If you somehow find out about this tutorial, you probably already know about AWS Lambda and Slack app, but I will just give an short description about it anyway.
- AWS Lambda is a cloud platform by Amazon where the unit of code that you publish is function, this way you can write a function and having it online without having to care about setting up server or scaling. AWS Lambda also incorporates well with orther AWS services.
- Slack app is an application that you can integrate into your Slack channel and have it automate tasks for the team. In this tutorial, we will built a particular type of Slack app, that is a Slash command.
Here’s the problem
Slash command will send an HTTP POST request to triggered a Lambda function and demands a respond back in less than 3 seconds. This is OK if the Lambda function is designed to do some light job and can finished under 3 seconds, but what if the Lambda function need to do more heavylifting job, the Slash command will declared that there was problem with the server, which is not cool at all for the heavy-lifting Lambda function.
The solution:
Simple enough, we will split the Lambda function we want into two Lambda functions.
- The first Lambda will receive information from the Slash command, preprocess the data if necessary, and then trigger the second Lambda along with the data then issues a respond to Slash command says that the command is being processed. All those step should be done well under 3 seconds.
- The second Lambda receive the information as request from the first Lambda, do its heavylifting job and then respond back to Slash command through a Webhook from Slash command that was passed down from the first Lambda.
- The bridge between two Lambda functions, the one enable triggering a Lambda function with another Lambda functions is AWS Simple Notification Service (SNS)
Now I will walks you through the steps to create a Slack’s Slash command, create first Lambda function, create a SNS event and a second Lambda function that responds to the original Slash command.
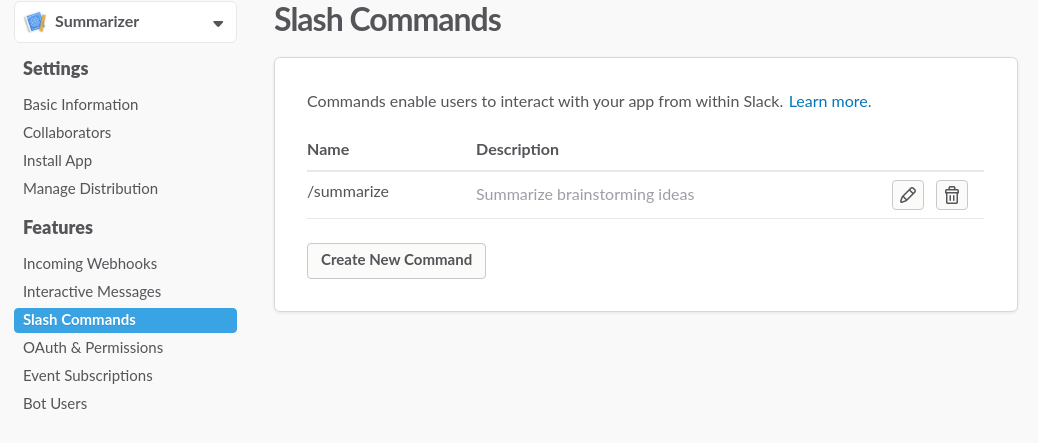
Step 1: Create Slack’s Slash command
First, refer to this page to know the basic about Slash command. To create a Slash command, we first need to create a Slack App.
- Go to this page and click on Create New App, fill in the name and done, it’s easy as that.
- Now in your Slack app page, go to Slash command and create a new command with your choice of name. Request URL field is where the Slash command will send the HTTP request to, type in any URL such as https://example.com, we will comeback and edit this later.
Step 2: Create Lambda function to handle the request
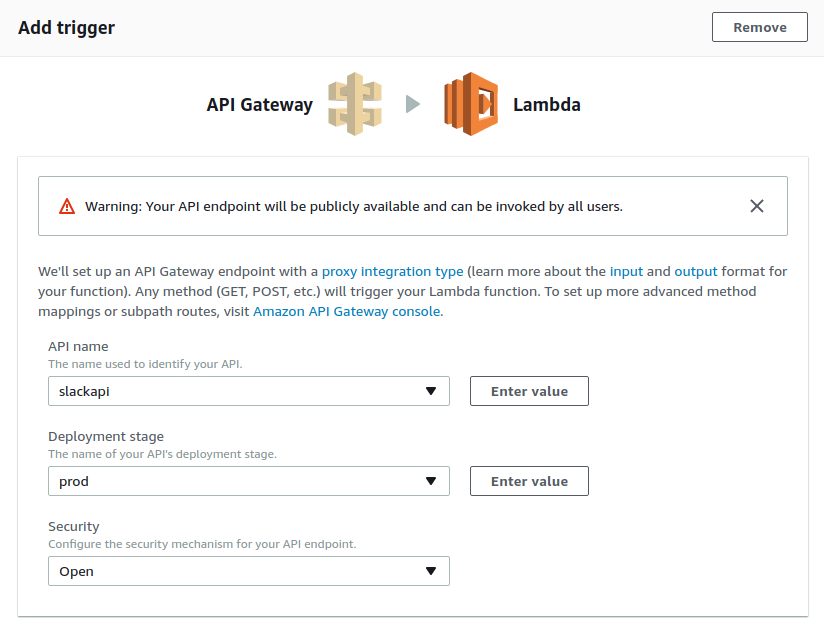
Sign in to your AWS Console and head for Lambda page then press Create function.
- Click the orange button Author from scratch - we will upload the code later.
- Now in the Configure triggers step, click on the square that point to the Lambda function and select API Gateway as our trigger.
!!! For those who wonder, API Gateway will setup an URL that handles the HTTP request from Slash command. The API Gateway also integrates well with Lambda function that it can trigger it when some activities happen with the URL from API Gateway - just exactly what we need.
- Next step, enter a name, description, choose Python 3.6 as Runtime. In the code entry paste this in:
import os
import json
from urllib.parse import parse_qs
import boto3

# Token use to verify the request really came from our Slash command
expected_token = os.environ['expect_token']

# Function to create a respond for the Slash command,
# it's must contain a statusCode, body and header
def respond(err, res=None):
    return {
        'statusCode': '400' if err else '200',
        'body': err.message if err else json.dumps(res),
        'headers': {
            'Content-Type': 'application/json',
        },
    }

# The actual function that handle the HTTP request
def lambda_handler(event, context):
    # Get the data posted by the Slash command
    params = parse_qs(event['body'])
    # The data format is described at https://api.slack.com/slash-commands

    token = params['token'][0]
    if token != expected_token:
        return respond(Exception('Invalid request token'))

    user = params['user_name'][0]
    channel = params['channel_name'][0]
    output = user + ",the command is being executed for the channel " + channel

    sns_publish(json.dumps(params))
    return respond(None, output)

# Function to publish message to SNS event,
# this event will inturn trigger our second lambda function
def sns_publish(message):
    client = boto3.client(
                'sns',
                aws_access_key_id=os.environ['aws_access'],
                aws_secret_access_key=os.environ['aws_secret'],
                region_name='ap-southeast-1'
            )
    client.publish(TopicArn='to-be-edited-later', Message=message)
In the code above, there’re some Keys that we need to create and assign before our function can run. Let’s do that in the next steps.
Step 3: Create a aws_access_key_id and aws_secret_access_key
“AWS Identity and Access Management (IAM) is a web service that helps you securely control access to AWS resources for your users. You use IAM to control who can use your AWS resources (authentication) and what resources they can use and in what ways (authorization).”
Now we need to create a User with admin privileges to have our id and key. Open a new tab and go to AWS IAM console, create a new User, and give it Programmatic access type.
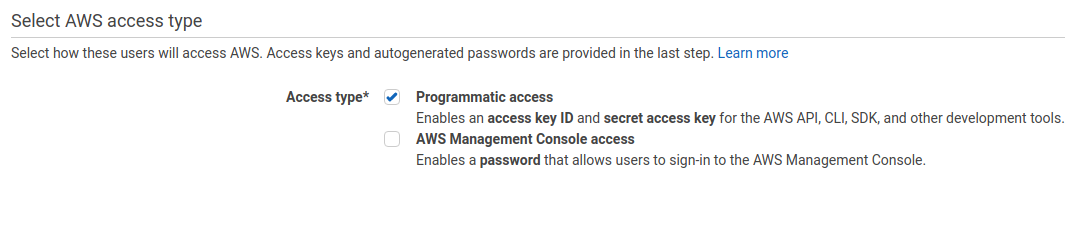
Now create a user group with admin access, in the final step, you will be provided with an Access key ID and Secret Access key, take note or copy it to somewhere as you can only see the Secret Access key ONCE.
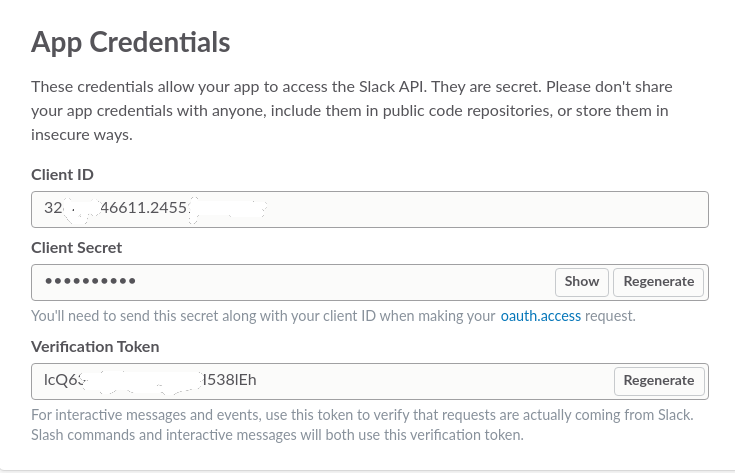
Step 4: Get expected_token
Go back to your Slack App on Slack API site, in the Basic Information section, take note on the Verification Token there.
Step 5: Provide the access key to the Lambda function
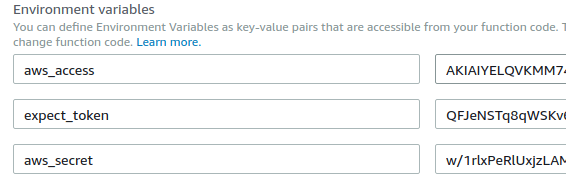
Now switch back to the Lambda function tab. As you can see from the code, we use 3 weird variables, has the form os.environ['whatever']. Each of these variable is declared in the environment that our code is executed upon, this way we don’t have to explicitly give up the secret on our code.
AWS Lambda provides a very easy way for us to declare environment variables. Just scroll down a bit, in the Environment variables fields, provide these variables with the Key you just created as follow, with expected_token is Verification token in step 5 and the other 2 variables are the id and key from step 4:
Step 6: Get the trigger URL and paste it in Slash command
After you’ve create a Lambda function with API Gateway trigger, go to Triggers tab, click on the API Gateway and copy the Invoke URL. Go back to Slack App, at Slash command edit the Request URL to the Invoke URL.
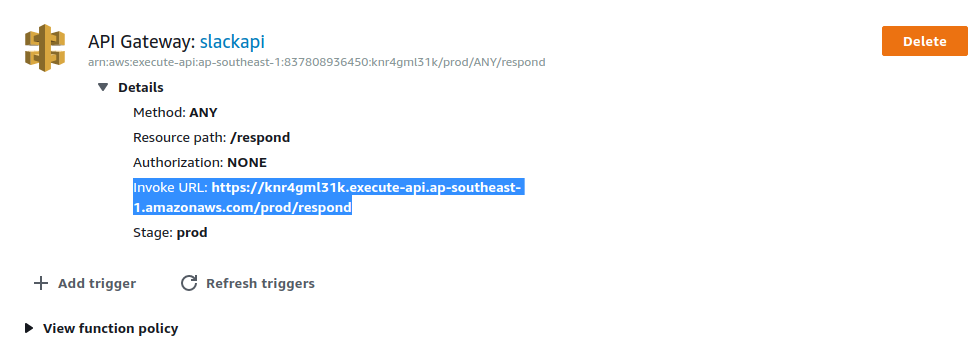
Now every time the Slash command is called, an HTTP request contains the information about the Slash command will be sent to the URL above, which passes down the information to our Lambda function and triggers it to work.
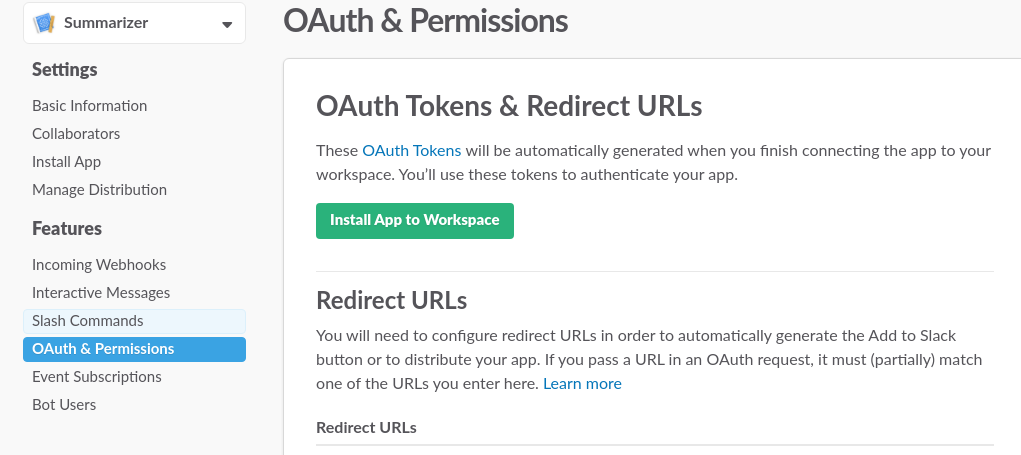
Step 7: Give your scope Slack App some permission scopes and install it to your workspace
Well, the header says it all. Just go to OAuth & Permissions, scroll down to Scopes, add a fews scopes that make sense for you app, scroll it back up and click install to your workspace.
Step 8: Create SNS event so Lambda function can publish to it
This step is simple, just go to AWS SNS console, create a Topic, name it and copy the ARN of the Topic you just created. Now go back to the code of the first Lambda function, in the TopicArn in sns_publish function, edit it to be the newly generated ARN.
Hooray.
At this step, you now have a Slash command that can trigger a Lambda function throught API Gateway, and have that Lambda function publish to a SNS Topic.
In the next steps, we will create another Lambda function that is triggered when an event is published to this SNS Topic, have it done something and then respond back to the original Slash command.
Step 9: Create second Lambda function triggered by SNS event
Repeat step 1 and 2, but in step 2, instead of choosing API Gateway, choose SNS and select the SNS event we created above.
In the code entry, paste this in:
import os
import json
from urllib.parse import parse_qs
import requests
import boto3

# Function to create a body respond for the Slash command, it's must contain a statusCode, body and header
def respond(res):
    return {
        "response_type": "in_channel",
        "text": res
    }

def lambda_handler(event, context):
    # Read the message pass from the event
    message = event['Records'][0]['Sns']['Message']
    # Load it into python dict
    message = json.loads(message)

    ###
    # Your heavylifting work done here
    # Take all the time you want, no need to worry about 3s Slack limit
    ###

    # Get the response url
    response_url = message['response_url'][0]
    #Send the response
    r = requests.post(response_url, data=json.dumps(respond("Your response here")))
Finish
Oh yeah. Now save the second Lambda functions and then we’re done.
You have a Slash app that triggered a Lambda that return an acknowledgement message function through API Gateway, this Lambda function in turn triggers a second Lambda function that do heavylifting work through AWS SNS.
The second Lambda function can also respond to the original Slash command through a Webhook response URL.

Here is an example of my Slash command, the first response is from the first Lambda function. The second line, in bolder font, is from the second Lambda function.